Wednesday, November 8, 2023

Old Horse, new brakes

If you follow this story, then you know my car has been running bigger, gripier tyres on bigger offset wheels.
It's also been running EBC Red stuff front and EBC green stuff rear.
As expected factory rotors started to show signs of the abuse under brakeing as you can depict by the colorful shades on the picture bellow.
yeah it's not been easy for the standard 300mm
SO...
...i'm now working on the new stopping upgrade.
Floating disks 330mm front and Floating disks 315mm rear
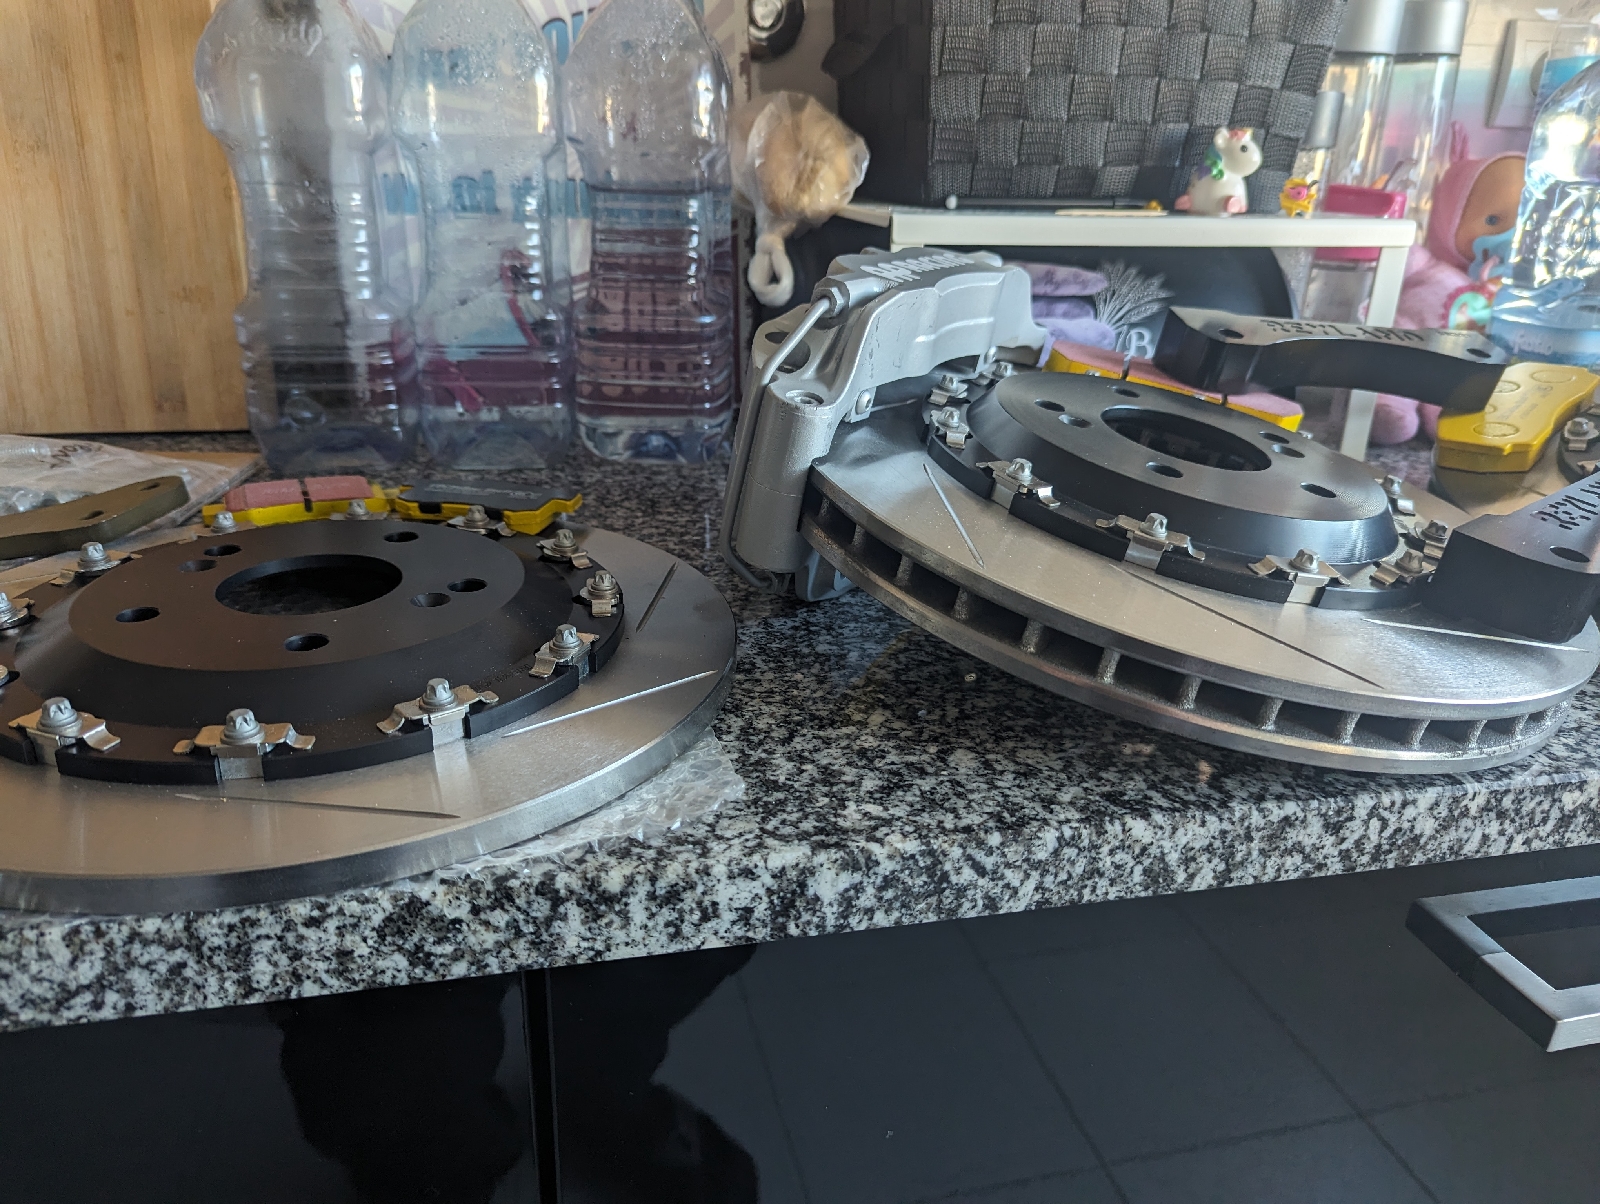
Rear retains the standard caliper but for the front ones i've just got hold of these:
some 9200's 4 piston (asymetrical area)  ready to bite.
They where yellow.. or red originaly, something I didn't want on my car, so Diogo Silva made this impecable paint job. If you are looking for a proper paintjob (with decalcs) Diogo is your man. You can reach him here: diogo2306silva@gmail.com
+351933590153

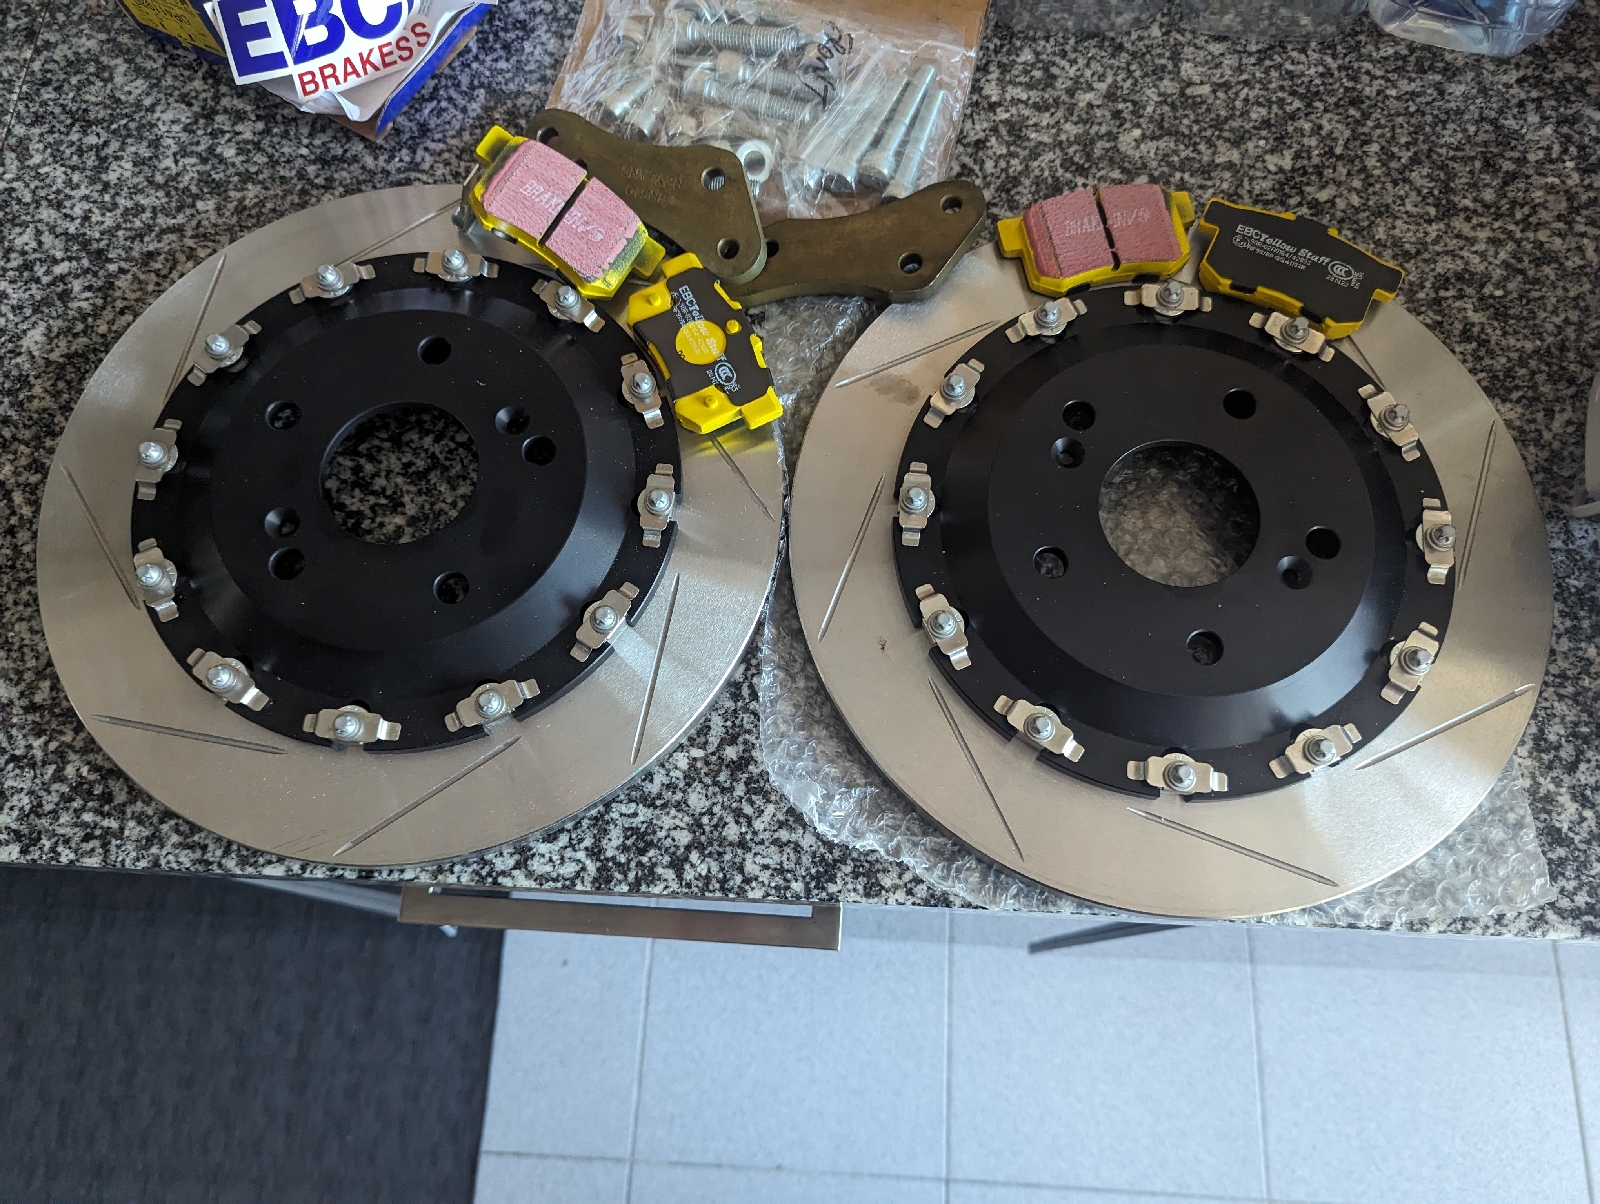
I'm now waiting on the reyland full floating grooved disks 315mm BBK for the rear end:
... and on my new reyland full floating grooved disks 330mm BBK for the front end:
The kit displayed here will not include the R calipers as, for 330 mm disks, the CP9200 are at capacity, but are lighter then the PRO R that can handle bigger diammeters.

... and some serious all round friction from EBC ( yellow stuff pads):
Kits includes mesh metal brake lines, so if the car used to stop on a dimme, it's gonna tear the road now :)

and it's Xmas .. the parts arrived. installing them soon.
Still to be continued... next year ;)

And continued :)
car got to the shop today and everything was installed:
and then front:
Brilliant job by Carmonauto lda, but the Reyland kit was a master-piece of a thing.
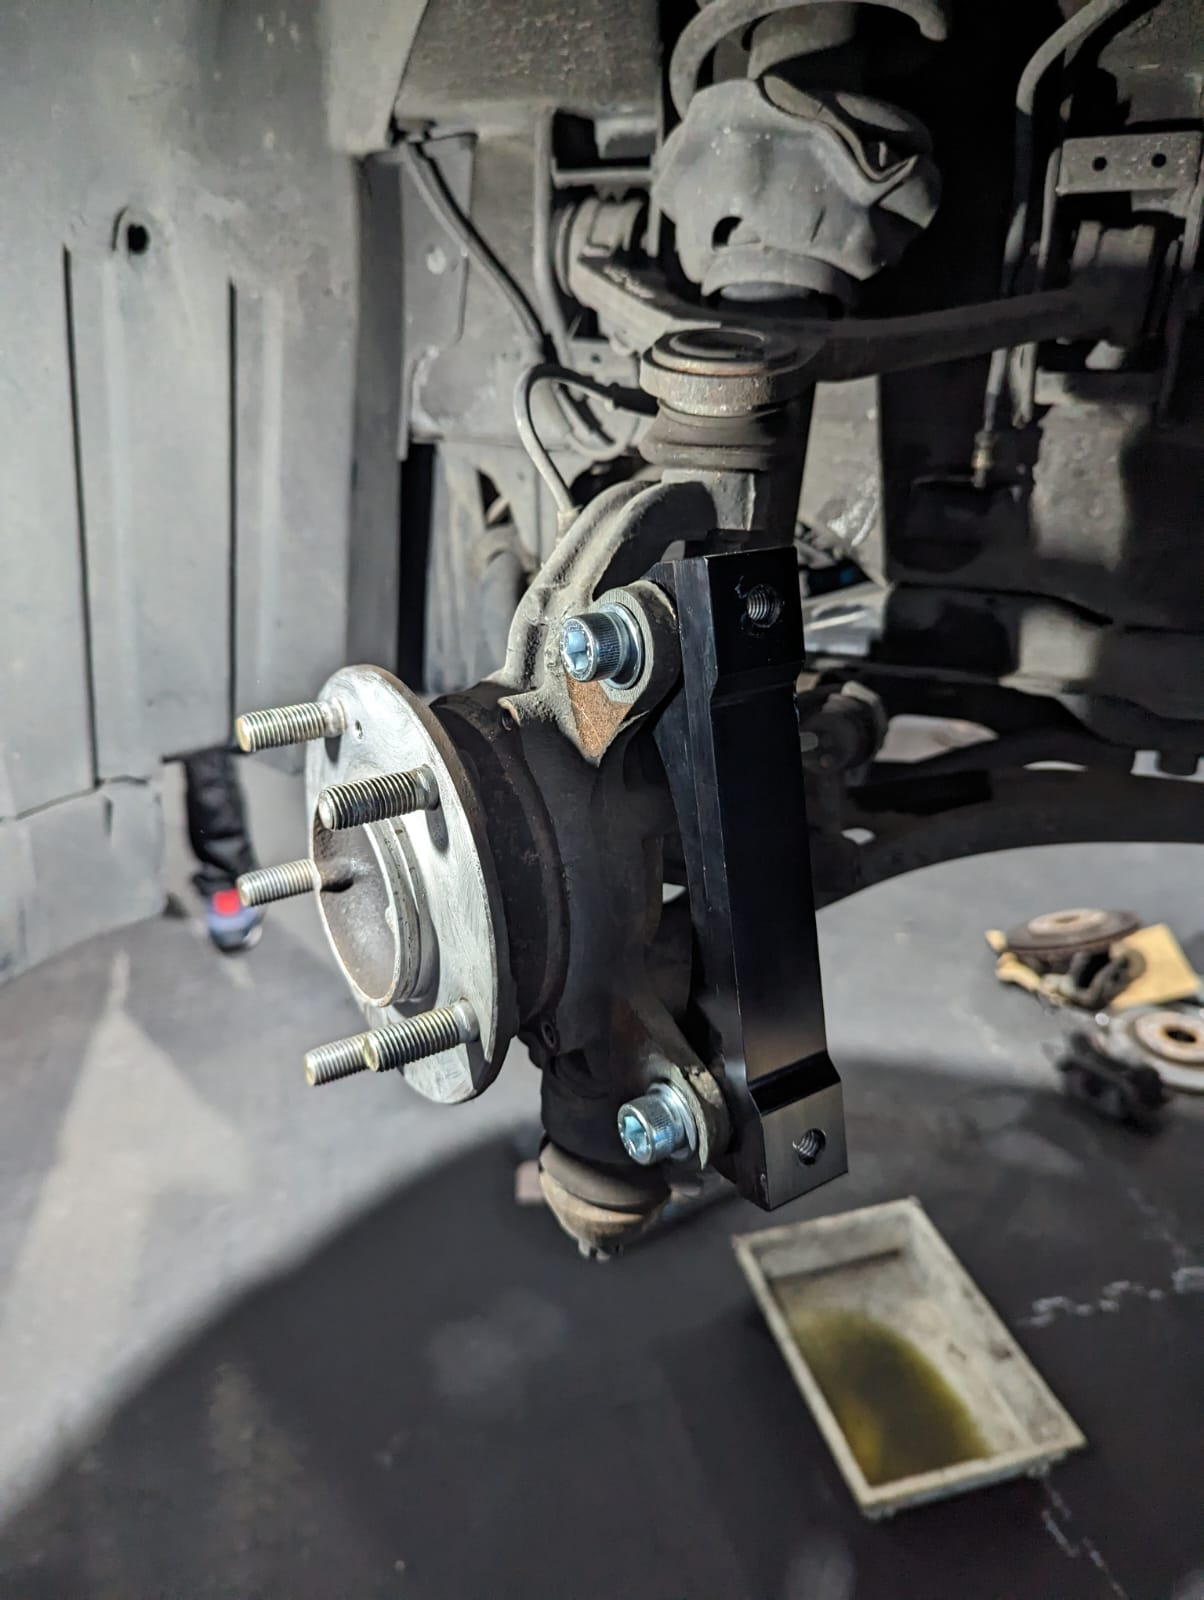
Everything fitted at first attempt, everything within dimentions and limits. 
Evidently, the rear shield had to be partially cut and the front one removed for good.

Driving Impressions:
Everything is still breaking in, so I didn't ready punish the thing. Having stated that, the car is much more balanced under braking. The tendency to dive the nose under braking, is reduced tremendously.
Everything seems more balanced and poised.
There is a lot less movement happening and that delays que rear comming out under braking.
As you progress que car seems to grip more and more, and finally start five the nose... the front calipers would obviously end up beating the rear ones and in dives the nose really late into braking line. But that gets linearly perceptible and only heavy braking.


Special thanks to:
Christian Lisboa - connections
Diogo Silva - Calipper painting and supply.

Wednesday, April 19, 2023

Engine vibrations... are... good!

Having a full racing clutch installed on your car, will get you into some charicat circumstances where you will need to either spin wheel, stall the car, or make a fool out of yourself by entering the harmonic stall-go-stall-go hickup mode.
Whenever you find yourself in hickup node, if your engine mounts are shot, you'll notice the engine ratling arround and that's bad.
So it's time to change'em.
Now why do engine-mounta go bad and then why call the article 'engine vibration is good'?
Engine mounts, on a road car, are made from rubber. There is steel screws surrounded by rubber, that screw the engine to the car chassis, but then, as any good rubber, introduce a jellow like effect, that aborbs engine vibration and restrains it from reaching the chassis, and consequently, your chair... and your ass as a direct consequence.
It's mostly about comfort... and you know how i think: Sophas are comfortable, cars are playstation like toys for men, so zero comfort, all fun and efficiency.

Consequently, after finding out that one of the engine mounts was bad, I brought this:
Now all i have to do is install'em and run the car. 
A LOT more vibration will be felt (good) but also sharper throtle response 
ww:re happy now :)

Thursday, March 23, 2023

Half-shaft Cv-joint vibrations, bump steer after offset changes or car lowering and MeganRacing solutions for you.

Anyone having an s2k for over 100.000km has been familiar with a strange vibration under acceleration that starts to become apparent as the car gains milleage.
This is due to the rear half-shaft cv joints hurting the cv joint bucket. 
This will become apparent if you run the car lower or with larger offler rimms, changing the geometry slightly... making it what!? 70% of s2k owners?! maybe more.

The solution is to change those parts... or you can just shift the buckets from left to right (you don't really worry about a small vibration while reversing... and add a cv shaft spacer like the one from megan racing.
The same goes for the bump-steer kit. Drive your s2000 lowered or with bigger offset wheels, and you'll find it very twitshy when it comes to road irregularities. Again, negan racingnhas a bump-steer fix kit that corrects the steering rack angles by adding 2 metal pieces underneath the setting rack mounts.

My car is not lowered but the 5Zigen Proracer GN+ weels are a huge offset difference that gets even more noticeable with the Toyo r888 tires.
So:
Evidently, more parts are in the mail... and soon the s2k will have even more inprovements to report.
Stay tuned.

Timing chain tensioner... no more issues... like forever.

The s2000 has a known issue with the timming chain tensioner. It has little spring strength and after some heat cycles it starts to loose strength progressively, until you hear a rattle while idling. 
This means that, unless you're pulling it and passing oil pressure throught it, it's not producing enought force to counter the slack that the chain gains over time.

This becomes more evident if you drive with thinner oils or on warmer climates.

The solution ia to replace the load spring with something... well stiffer. However, assempling it back is a pain in the ass as the parts need some sort of force to counter the auto adjustment screw, but, the original part, has this as a sinple retainer and that is just a no-go.

Solutions? you can evidently replace with oem, and spend your life doing it every 30 to 50000km. You can transform the part yourself, or you can just buy a track ready part from TODA Racing engineering. Guess what I chose? oem parts out, racing parts in ...the usual!

Install is easy and you can do that in 10 mnts.
The rattle is gone, but that again, a factory part would be the same for a while...it's the future that will tell.
lovely! 

Monday, December 5, 2022

Time to work on that old organic clutch. Friction improvement part 2.

Hi everyone 
So the car is back on the road, after years stopped at the garage, and some issues arose instantly.
1- the clutch... it slips midrange.
2- wheel bearings are shot.
Evidently, I instructed the mechanic to replace the bearings with OEM parts, but not the clutch. That, I took under my care as, again, I believe that OEM is always a compromise, and an s2000 should be a no compromise car.
As such, after looking for several alternatives, ai decided to go for: Competition Clutch.
Stage 4 to be precise, and since we are to open the thing... flywheel was an easy hoock-up, so, UltraLight flywheel is ordered too.
I'll update the post with new images as I get the parts, but for now, some ebay screeshots will do.

1- ultra light competition clutches flywheel
2- stage4, ceramic 6pad  spring'd competition clutch with 300% clamp force pressure plate 
Stay tuned... but this mod will make the already amazing mid-range (AEM V2) extend rigth into vtec range as rotational inertia is reduced and High flow (decat) will improve high-end delivery.

Response should also improve, but i'm cooking a diferent approach for that one... depending how the PUMA ST220 itb project goes, I may create a killer recipie that doesn't bankrupt you, for s2k's

Update: WOW

The car feels a lot more rev happy. And if you lift-off (or reverse) it sounds like a grinder, but hey machanical noise is part of the fun... this is why I hate comfortable and filtered-out cars in the first place.
Under vtec is seams quicker to gain revs and evidently it's a hitch in slow traffic. The engagement is close to all or nothing and with about 8cm pedal travel...but the worse is that, unless you plant the back of your foot on the car floor and leverage, the 300% more clamping force makes you stall the car or spin the tires. So yeah, slow traffic if bad, but the s2k was not built to live on a traffic in the first place. 
The first day of rain made me spin 1st, 2nd, and 3rd (under vtec), and fortinately I heel&toe for years now, else the first shift down would have been... bad... bad is the word for locking your reqr wheels mid highway exit.

Very good upgrade, but DO take the driveability impact into consideration if you don't have a dailly driver alternative to your s2k.

The difference in weight between the oem cluth assembly (spring, plate and flyweel) is considerable. The car will stall easier and the speed to gain or loose rpms will also be quicker.
In my case, with an AEM v2 CAI and a decat job you can clearly feel a stronger vtec kick.

Wednesday, May 18, 2022

S2000 HID to LED conversion ... DIY, NO KIT!

The S2000 is equipped with factory xenon bulbs. It was nice back then... it was expensive back then... it is expensive still. 

When your bulbs go, you're looking at a good 60Euro/each, but have some moisture enter the headlight body and the ballast will go, and those are WAY more expensive. 

And trust me, they'll go out some day. There is also the matter that they are not Bi-xenon, They light pretty good ahead, but more is better, and they take their time to heat and provide the best light. LED, on the other hand, is powerful, cheap, they last longer and you can use the increased efficiency to add power to the package... equaling MORE LIGHT. 

So how did I do it?

1- Remove the front bumper, and while with the wrench at hand, remove the headlight lower support (small metal bar under the headlight assembly)


2- Without surprises... proceed to remove the headlights.


3- Start to dissemble the headlight. The ballast is external on this boy, so you can just remove it and, if it works, EBAY the thing. You'll never need that again. Remove also, the lamp, coil pack and cable.


4 - Depending on the LED bulbs you've chosen, you may have to make some adjustments to the fittings, I used a step-drill and bored enough to fit an H7 1300W equivalent, vented aluminum light.  If you opt for h1's you'll probably find out there's a lot less to drill. Still It's all plastic so the drilling is messy but easy. 

DO NOT forget to air-blast the assembly till all the dust comes out. Else, you need to place the headlight assembly in the oven (soften the glue) and then pull the glass appart to clean...NOT an enjoyable experience.

5 - Create the Wiring for the new Lights. You'll need to plug into the ballast input plug.

You should test the connections before insulating them.


 Remember: if it doesn't work, check the polarity.

6 - Use a good Insulator. I'm a fan of T-Rex... it's good, easy to work with and it can resist a nuclear attack. 

Do not forget : you're fighting moisture... and THAT gets everywhere! Make sure you're sealing things nicelly. 

Do not worry with dismantling as LED lasts way longer and, in this case, changing bulbs is easier with the front off and light assembly out... you can go crazy on the insulation.

7 - Test!

Presence lights:


LowBeams:


HighBeams:


The end result is better light (even during day time and with garage lighting, it's noticeable), longer life, WAY less money and it's cool :)